Create a project directory, initialise git repository and copy some files:
mkdir gitter
git init
ls -a
. .. .git
git add -n /Users/ergun/gitter/ // -n: dry-run
git add /Users/ergun/gitter/ // actual add (stage)
git commit -m 'initial project version' /Users/ergun/gitter/
You may use add command to add new files or stage modified files.
Only staged files can be committed.
This is how you exclude DerivedData folder under your project folder:
Edit .git/info/exclude and add this line:
DerivedData/
x
Thursday, January 17, 2013

Tuesday, December 4, 2012
IOS Provisioning
Creating a Developer Certificate
When developer certificate is close to expire or you have provisioning conflicts you may need to have a fresh start. Start with creating a new certificate:
Somehow the old developer certificate is cached in XCode and added to KeyChain. To fix this it needs to be removed from KeyChain. The old developer certificate has an earlier expiration date and it is labelled as "iPhone developer..".
When developer certificate is close to expire or you have provisioning conflicts you may need to have a fresh start. Start with creating a new certificate:
- Revoke the old certificate from IOS portal/Certificates
- Create a new certificate from Keychain Access on Mac using KeyChainAccess/Certificate Assistant/Request a Certificate From a Certificate Authority menu option and Save to Disk.
- From IOS portal/Certificates upload new certificate then Submit. Refresh browser.
- Download IOS Development Certificate (ios_development.cer) and run.
Remove the duplicate development certificate
This step is required to fix an error when you build your project in XCode, after installing new certificate:
CodeSign error: Certificate identity 'iPhone Developer: XXXX (12345678)' appears more than once in the keychain. The codesign tool requires there only be one.
Somehow the old developer certificate is cached in XCode and added to KeyChain. To fix this it needs to be removed from KeyChain. The old developer certificate has an earlier expiration date and it is labelled as "iPhone developer..".
- Exit XCode
- In KeyChain Access under Login KeyChain/My Certificates category remove the old developer certificate starting with "iPhone developer..".
- In KeyChain Access under System KeyChain/Certificates category remove the old developer certificate starting with "iPhone developer..".
- Start XCode. This may recreate the old certificate again. Repeat steps 2 and 3.
App IDs
On the Provisioning Portal App IDs section enable required entitlements (such as iCloud) for both wildcard XXXXXXXXXX.* and XXXXXXXXXX.com.company.product.* App IDs. Enable all entitlements for simplicity.
Create Provisoning Profiles
On IOS Provisioning Portal delete all provisioning profiles under Provisioning section.
You need to create:
Create Provisoning Profiles
On IOS Provisioning Portal delete all provisioning profiles under Provisioning section.
You need to create:
- A Development Provisioning Profile for wildcard App ID
- An AppStore Distribution Profile for product App ID
- An Adhoc Distribution Profile for product App ID
On XCode:
- Remove all provisioning profiles under Organizer/Library and Organizer/Device sections.
- Under Library/provisioning Profiles click Refresh on the bottom right.
- Check that under Organizer/Device required profiles were created. If not drag them from Organizer/Library section.
Setup XCode
On XCode
- Create two Schemes "Adhoc" and "App Store" from Product/Edit(New) Scheme.
- Set Archive/Build configuration of Adhoc scheme to "Adhoc distribution"
- Set Archive/Build Configuration of App Store scheme to "Release".
- On Build Settings/Targets pick Ad Hoc Distribution Profile for Ad Hoc Distribution Code Signing Identity.
- On Build Settings/Targets pick Team Provisioning Profile (generated by XCode) for Debug Code Signing Identity.
- On Build Settings/Targets pick App Store Distribution Profile for Release Code Signing Identity.
- Delete Product
.entitlements file. - On Targets/Summary check Entitlements box and fill relevant entitlements. For example if your app uses iCloud, check Enable iCloud checkbox and add your product App ID to Ubiquity Containers section.
- Some sections will be filled and created by XCode.
If you complete all above successfully you should be able to Debug your app on a connected device, upload your app in Ad Hoc distribution mode to your device, upload your app to App Store, or run your app on a simulator.
When you are ready to submit to App Store make sure to pick up the App Store Scheme, then Archive.
References:
Video on certificate creation:
CodeSign error: Certificate identity 'iPhone Developer: XXXX (12345678)' appears more than once in the keychain
References:
Video on certificate creation:
CodeSign error: Certificate identity 'iPhone Developer: XXXX (12345678)' appears more than once in the keychain
Tuesday, January 17, 2012
Syntax highlighter from Google Code
I enabled my blog with an awesome syntax highlighter from Google Code.
For details see:
    private void LoadLayout()
    {
        LayoutSaver aLayoutSaver = new LayoutSaver();
        aLayoutSaver.LoadLayout(this);
        diagramView1.Diagram.RouteAllLinks();
        diagramView1.Update();
        UpdateLinksBetweenShapes();
    }
For details see:
Saturday, November 19, 2011
Photo Streams across iCloud
In Apple Ecosystem iCloud can be used as a transient repository to transfer photos between your IOS devices and your Mac computers.
To a Mac or to an IOS device a Photo Stream is a stream of photos synchronised with photos stored on iCloud.
When you enable Photo Stream on your IOS device the photos you take with your device goes to your Camera Roll Album as well as to Photo Stream Album on your device. Then when your IOS device is connected to Wi-Fi and your Photos application is open (running) the photos will be uploaded from your Photo Stream to iCloud.
When you enable Photo Stream on your MAC the photos stored on iCloud will be downloaded to iPhoto Stream. The Photo Stream on your Mac is represented like a virtual folder in iPhoto as the following image shows:

In time photos will build up on your iCloud taking up space. You may think it is a good way to back up your photos.
Otherwise if you prefer to backup your photos on your Mac (and Time Machine) you may delete photos from iCloud to prevent clutter. But doing so will not delete Photo Stream on your IOS device or on your Mac.
You need to switch Photo Stream option on your IOS device to OFF to delete contents of Photo Stream on your IOS device. With this action the Photo Stream Album in your IOS devices's Photos application is removed. However the photos will still remain under Camera Roll Album.
Similarly you need to switch Photo Stream option to OFF to delete contents of Photo Stream on your Mac. With this action the contents of iPhoto Photo Stream are removed. However the photos will still remain under Library/Photos.
To a Mac or to an IOS device a Photo Stream is a stream of photos synchronised with photos stored on iCloud.
When you enable Photo Stream on your IOS device the photos you take with your device goes to your Camera Roll Album as well as to Photo Stream Album on your device. Then when your IOS device is connected to Wi-Fi and your Photos application is open (running) the photos will be uploaded from your Photo Stream to iCloud.
You may toggle Photo Stream ON or OFF on your IOS device from Settings/iCloud/Photo Stream or from Settings/Photos. These settings are the same, changing them in one is picked up by the other.
When you enable Photo Stream on your MAC the photos stored on iCloud will be downloaded to iPhoto Stream. The Photo Stream on your Mac is represented like a virtual folder in iPhoto as the following image shows:
This corresponds to Photo Stream Album on your IOS device.
You may toggle Photo Streams ON and OFF on your Mac from System Preferences/iCloud/Photo Stream or from iPhoto Preferences/Photo Stream panel. These settings are the same, changing them in one is picked up by the other.
In time photos will build up on your iCloud taking up space. You may think it is a good way to back up your photos.
Otherwise if you prefer to backup your photos on your Mac (and Time Machine) you may delete photos from iCloud to prevent clutter. But doing so will not delete Photo Stream on your IOS device or on your Mac.
You need to switch Photo Stream option on your IOS device to OFF to delete contents of Photo Stream on your IOS device. With this action the Photo Stream Album in your IOS devices's Photos application is removed. However the photos will still remain under Camera Roll Album.
Similarly you need to switch Photo Stream option to OFF to delete contents of Photo Stream on your Mac. With this action the contents of iPhoto Photo Stream are removed. However the photos will still remain under Library/Photos.
Tuesday, July 12, 2011
Resolving code signing issues
/Developer/Applications/Utilities/Application Loader does not work.
You need to sign and deploy your app from within XCode 4.
You need to sign and deploy your app from within XCode 4.
- Under Project/Code Signing options set Code Signing Identity to your "3rd Party Mac Developer Application:.." certificate.
- If you link to static libraries they will be installed into the archive by default and they will cause code verification to fail since they don't have code signing option. To prevent this error open the xcodeproj file of static library and set Build Settings/Deployment/Skip Install to Yes.
- Select Product/Archive then Validate and Submit.
Thursday, June 16, 2011
Dealing with Help Viewer cache
It is pain in the neck to deal with Help Viewer cache when developing your Help documents. After updating your indexes with Help Indexer, you may find Help Viewer refusing to open your Help Documents, links do not work, or show empty pages. This happens because more often than not the version number of your help document in the plist is not bumped up.
To fix this problem, I wrote the following bash script to clear several cache repositories Help Viewer and Help Indexer is using.
Create a text file using the text editor pico from the command line:
pico ./hvfix
Edit your text file, then save on exit:
rm -rf ~/Library/Caches/com.apple.help*
rm -rf ~/Library/Preferences/com.apple.help*
rm -rf ~/.Trash/*
killall helpd
defaults write com.apple.helpindexer IndexAnchors YES
Before you run the script make sure to give executable permissions to your script like this
chmod +x hvfix
./hvfix
Then run your script:
./hvfix
This script also automatically sets "Index anchor information in all files" checkbox (which is normally needed for anchor indexing) before you run the Help Indexer next time.
To fix this problem, I wrote the following bash script to clear several cache repositories Help Viewer and Help Indexer is using.
Create a text file using the text editor pico from the command line:
pico ./hvfix
Edit your text file, then save on exit:
rm -rf ~/Library/Caches/com.apple.help*
rm -rf ~/Library/Preferences/com.apple.help*
rm -rf ~/.Trash/*
killall helpd
defaults write com.apple.helpindexer IndexAnchors YES
Before you run the script make sure to give executable permissions to your script like this
chmod +x hvfix
./hvfix
Then run your script:
./hvfix
This script also automatically sets "Index anchor information in all files" checkbox (which is normally needed for anchor indexing) before you run the Help Indexer next time.
Friday, February 18, 2011
How to detect memory leaks in OS X Applications
In this tutorial I am going to demonstrate how to detect memory leaks in your OS X applications. We are going to use XCode development environment and Instruments tool that comes with XCode.
1. Put a break point at the end of your application. In this example we have a simple application called Prog1 which we set to deliberately leak memory. Note the commented out line that would cause a 16 byte memory leak:
//[aFraction release]:
2. Run the application in Debug mode and let it stop at the breakpoint.
3. Meanwhile locate the tool called Instruments under Developer/Applications and run it.
4. Select the template called Leaks and press Choose.
5. This will bring up a panel with Allocations and Leaks Instruments.
6. Select Leaks instrument by clicking on it.
7. Click Target selector on top left and choose the option Attach to Process.
8. From the drop down menu of running processes choose your application by name (eg. Prog1)
9. Press the red Record button on top left. This will start a memory leak detection session.
10. When leaked objects are listed press the red button again to stop.
11. The first line reporting 128 bytes leak is a false alarm it has nothing to do with your application. All Cocoa applications leak 128 bytes. Some argue this is an Apple bug that needs to be fixed.
12. The rest in the listing are your applications' memory leaks. The neat thing is your leaked object's type is given, in this case the class Fraction and how much it leaked.
1. Put a break point at the end of your application. In this example we have a simple application called Prog1 which we set to deliberately leak memory. Note the commented out line that would cause a 16 byte memory leak:
//[aFraction release]:
 |
| Cick to enlarge |
3. Meanwhile locate the tool called Instruments under Developer/Applications and run it.
4. Select the template called Leaks and press Choose.
 |
| Click to enlarge |
5. This will bring up a panel with Allocations and Leaks Instruments.
6. Select Leaks instrument by clicking on it.
 |
| Click to enlarge |
7. Click Target selector on top left and choose the option Attach to Process.
8. From the drop down menu of running processes choose your application by name (eg. Prog1)
9. Press the red Record button on top left. This will start a memory leak detection session.
10. When leaked objects are listed press the red button again to stop.
11. The first line reporting 128 bytes leak is a false alarm it has nothing to do with your application. All Cocoa applications leak 128 bytes. Some argue this is an Apple bug that needs to be fixed.
12. The rest in the listing are your applications' memory leaks. The neat thing is your leaked object's type is given, in this case the class Fraction and how much it leaked.
Subscribe to:
Posts (Atom)
How to recover from Mac Book Pro catastrophes
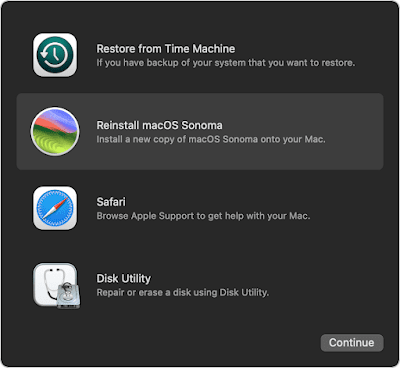
Synopsis DISCLAIMER: This article applies to Intel based MacBook Pro 4th generation models with a Touch Bar (2006-2020.) The methodology giv...
-
 Problem There are two problems when you close sessions and windows in ITerm2. When you gracefully exit from ITerm2 sessions with a recommen...
-
It is pain in the neck to deal with Help Viewer cache when developing your Help documents. After updating your indexes with Help Indexer, yo...
-
 In this tutorial I am going to demonstrate how to detect memory leaks in your OS X applications. We are going to use XCode development envi...